In the previous SAP CAP tutorial on Creation of SAP Fiori Application with SAP CAP and SAP HANA Cloud – Part 1, we have created dev space in SAP Business Application Studio (BAS), configured it, and started the creation of our first full-stack CAP project in BAS, and created database entities and service interface for SAP HANA Cloud. In this SAP CAP tutorial, we will continue the creation of our full-stack Fiori application.

In Part 2 of the SAP CAP tutorial series to create SAP Fiori application with SAP CAP and SAP HANA Cloud, you will learn –
- How to generate database artifacts and deploy them into HANA Database
- Explore SAP HANA Database Explorer and load data into database tables
- How to run and test CAP service entities locally
- Create SAP Fiori application by consuming CAP service entities.
Let’s continue to create SAP Fiori Application
Below is the step-by-step procedure.
1) Generate runtime artifacts and deploy them into HANA Database
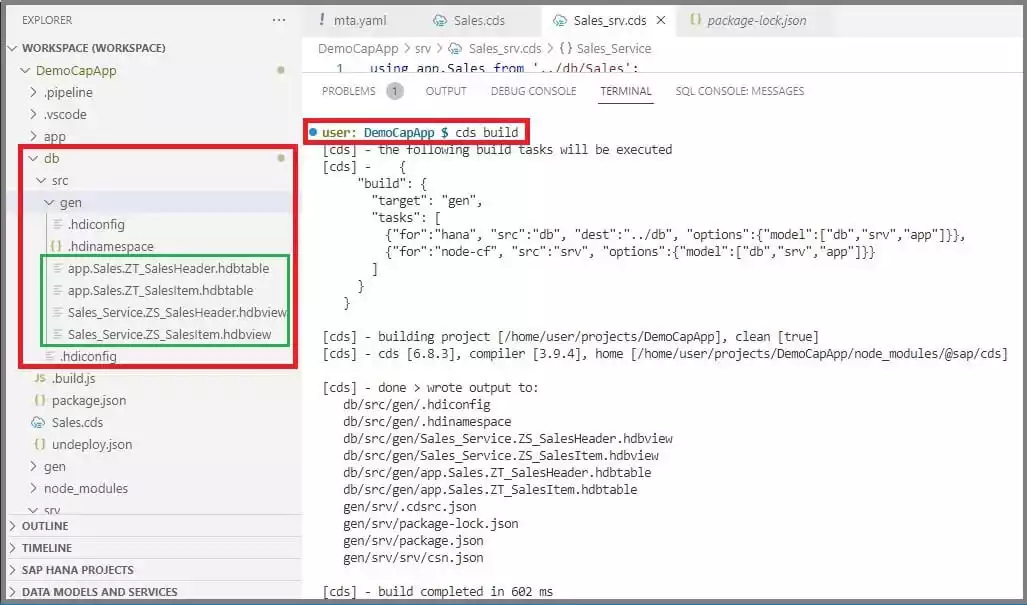
a) In the terminal, run the command cds build.
You can see in the terminal that CDS artifacts have been converted to hdbtable and hdbview, and they are stored in the folder gen under db/src folder.
b) Next step is to deploy those artifacts into the SAP HANA database to create tables. We will use ‘SAP HANA Projects’ for this process.
From the left side navigation, expand ‘SAP HANA Project’ and expand your ‘project name/db‘ folder as shown in the below image.
Now, bind your project to a Database Connection and HDI container service instance. Press the ‘bind’ icon as shown in the below image.
If you receive a warning popup window then click on ‘Continue’ and ‘Enable’.
If you have received a command pallette at the top of the Business Application Studio screen, then select the option ‘Bind to an HDI container’.

On selection, you will receive one more option to bind the default service instance or to create a new service instance. For this tutorial, we will select ‘Create a new service instance’.
You might receive an option to select your existing service instance (if you have already created any service instance).

Edit the prepopulated service name to set a new name. Once the name is set then hit Enter to proceed.
Note – If you receive an error message while binding your project to the HANA Cloud HDI container then check below mentioned two options –
1) Check if you are logged in to the Cloud Foundry – Open the terminal and run the command
cf login–> Enter the Email and Password to login to the Cloud Foundry.2) Check if your SAP HANA Cloud Database is in a ‘Running’ state.
If it’s showing status as ‘Stopped’ then you need to Start the instance. (Click on three dots under actions and select the ‘Start’ option).


If you receive a warning popup window then click on ‘Enable’.

Now, the service creation process will get started and you can see the progress at the right-side bottom of the BAS screen. It will take a minute or two to finish the process.

On completion of the process, the database connection will show that the service is bound to the instance.

You can also check the created service instance in ‘SAP BTP Cockpit’ under ‘Instances and Subscriptions’.

The next step is to deploy the db artifacts (which you can see inside gen folder) into the SAP HANA database. Press the ‘Deploy’ button in the ‘SAP HANA Projects’ view as shown in the below image.
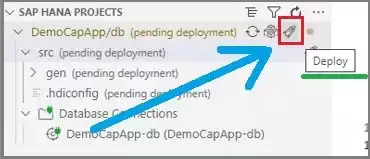
Once deployment is complete, you will receive the message as shown in the below image.

Note – Original
.cdsfile is converted intohdbtablewhen you run the cds build command and these hdbtable files then converted into runtime objects as tables and views in SAP HANA database.
2) Navigate to SAP HANA Database Explorer
To check the generated tables and views, navigate to SAP HANA Database Explorer.
In SAP HANA Projects, click on ‘Open HDI Container’ as shown in the below image.

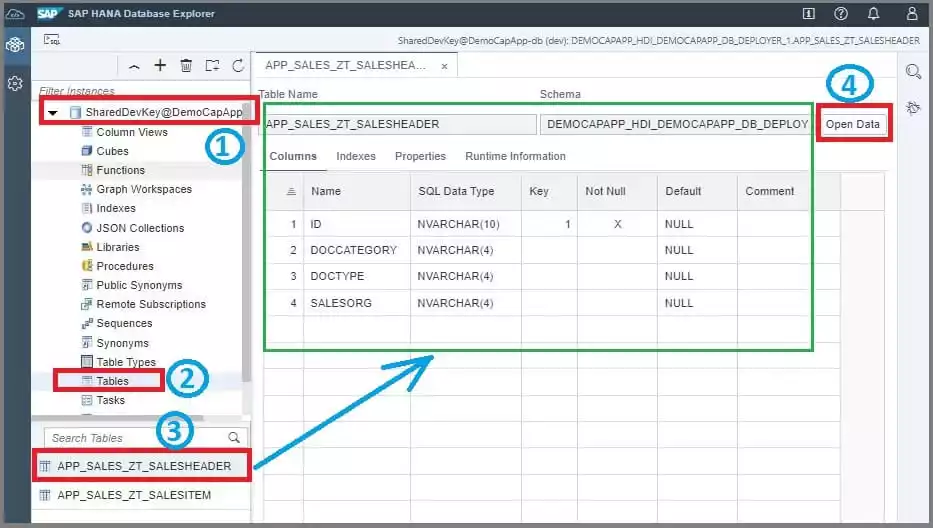
SAP HANA Database Explorer will get open in a new tab. In the left-side navigation, check if your HDI container instance gets automatically selected.
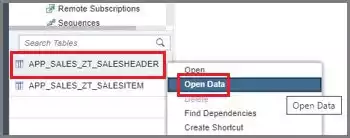
Now click on ‘Tables’ and again click on the Sales Header table. You can see the table structure details. To check table data, click on the ‘Open Data’ button (currently we have not inserted any data, so you will not see any data).
Points to Remember –
1. You can also navigate to the SAP HANA Database Explorer from ‘SAP HANA Cloud Central’.

Where you need to enter the username and password. (This is a one-time activity for registration.) The username will be DBADMIN and the password is one which you have set while creating the SAP HANA Cloud Database instance in SAP HANA Cloud Central.

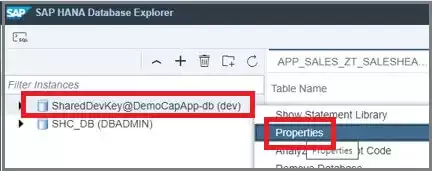
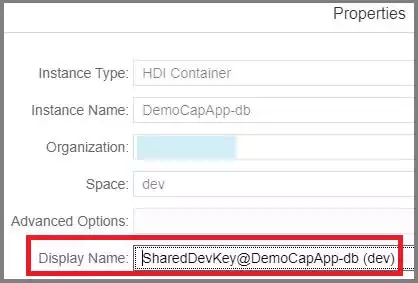
2. The display name of the HDI container instance is automatically generated and it’s related to the project. You can change that name.
Right-click on the HDI container instance –> Click on ‘Properties’ –> Set the display name that you want.
3. Name of the table in database explorer matches with the generated db artifact ‘hdbtable’.
3) Load data into SAP HANA Cloud database tables
To load data into the tables, follow the below steps-
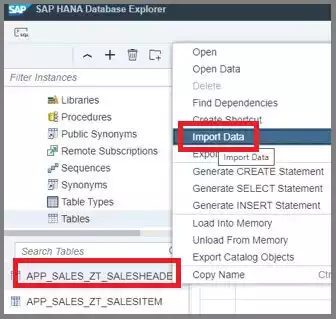
1. Right-click on the table in which you want to load the data and select the ‘Import Data’ option.
2. Select the option ‘Import Data’ and click on the ’Step 2’ button.

3. Select the drop-down value ‘Local’ for the field ‘Import Data From’. Select both checkboxes. Click on ‘Browse’ to upload a .csv file to import and click the button ‘Step 3’.

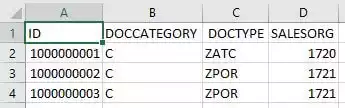
Take reference to the below-mentioned data to prepare sales header data in .csv file format.
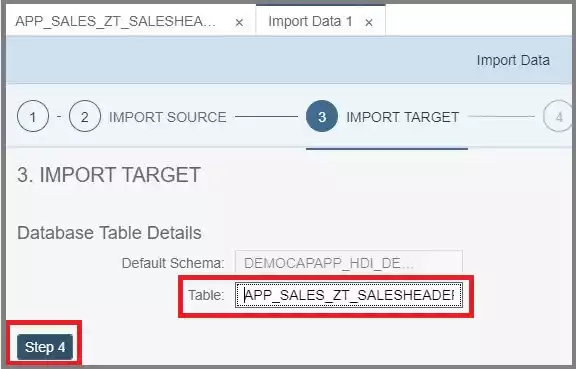
4. Do not change the default value of the field ‘Table’ and click on ‘Step 4’.
5. Do not change the default table mapping and click on ‘Step 5’.

6. In the error handling step, select any option you want and click on ‘Review’.
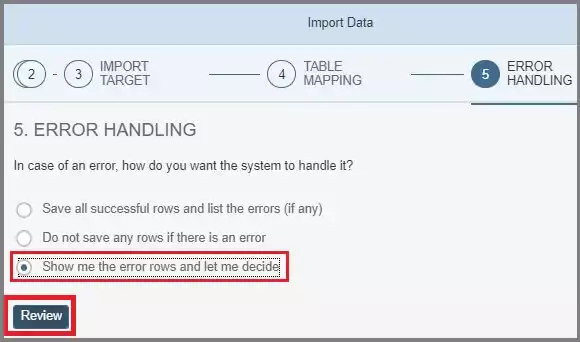
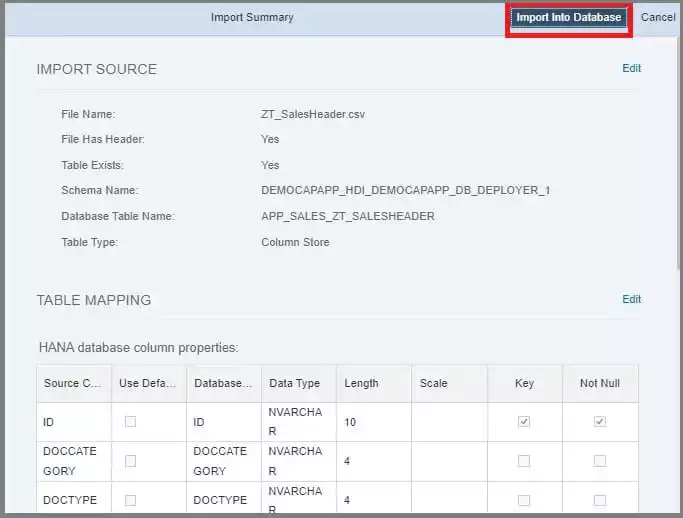
7. Click on ‘Import into Database’.
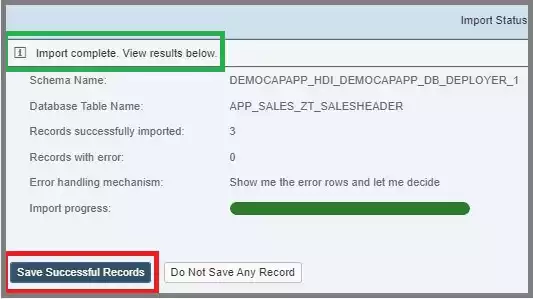
8. Once you get the information message ‘Import complete’ and there is no record with an error, then click on ‘Save Successful Records’.
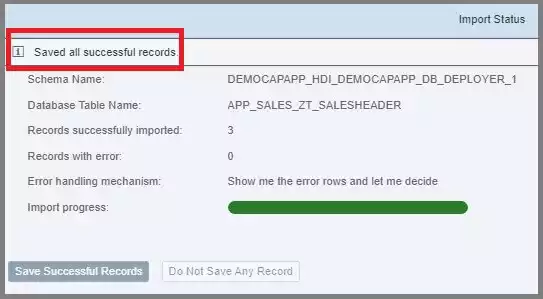
9. Done! You will get the information message that the records are saved successfully.
10. To check the table data, right-click on the sales header table and click on ‘Open Data’.

11. You can repeat the above steps to load data into the Sales Item table. Refer below table data to prepare .csv file.

4) Run & Test the CAP Service Entities
You can test your CAP service locally by connecting your CAP application to the HANA Cloud HDI service instance. We have created a new service instance named ‘DemoCapApp-db’ (refer above to Step 1), to which we can bind our application locally to start the CAP service layer. This will help to decide which database entity and service entity you want to use.
To perform the bind activity, run the command cds bind -2 DemoCapApp-db:SharedDevKey.

Run the command npm install to install any Node.js dependent modules.

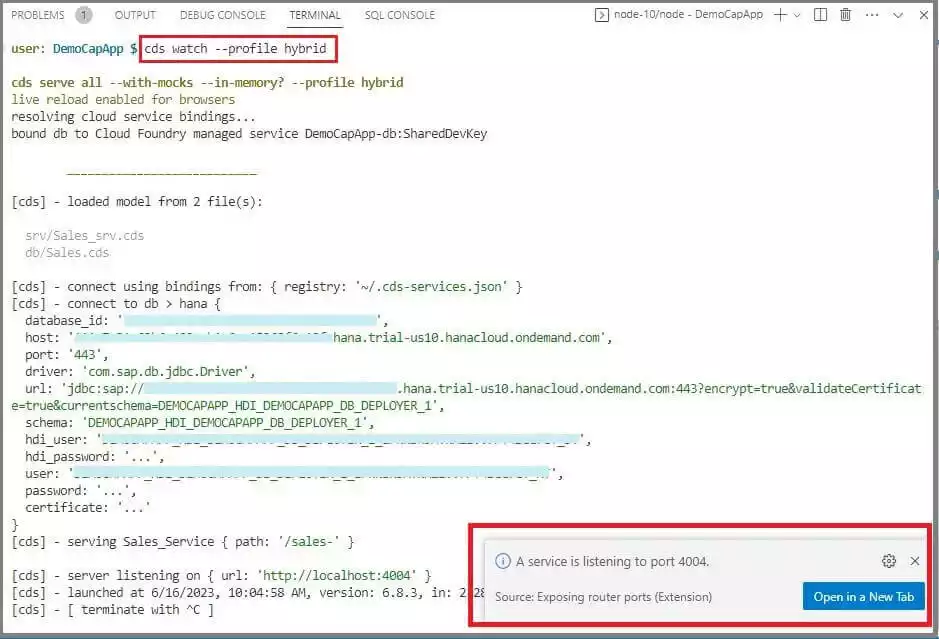
Now, run the command cds watch --profile hybrid. With this, you can start testing your CAP application which is now connected to the HANA database. You will see a popup window at the bottom right corner as ‘Open in New Tab’. Click on it, to start testing your CAP service.
You can see the list of service entities.

Now click on the entities to see the values which are coming from the SAP HANA Cloud database. You can test the generated OData service by applying filters to the URL.

5) Create SAP Fiori Application
Let’s create a Fiori Freestyle UI for the CAP service entities. Below is the step-by-step procedure.
1. Right-click on mta.yamland select the option ‘Create MTA Module from Template’.

Select the ‘SAP Fiori application’ tile and click on the ‘Start’ button.

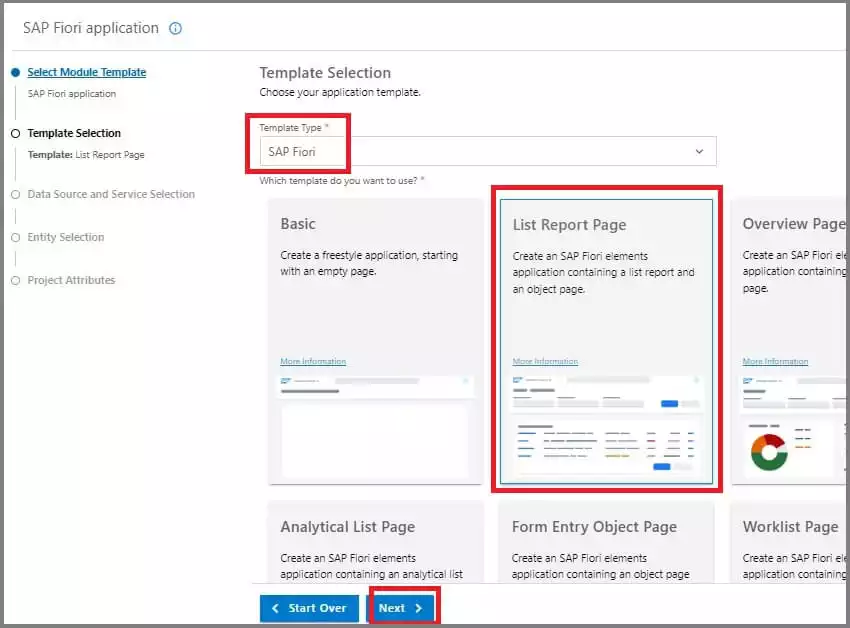
2. At the application template screen, select ‘SAP Fiori’ as the template type and select ‘List Report Page’ as a template for your SAP Fiori application. Click on ‘Next’.
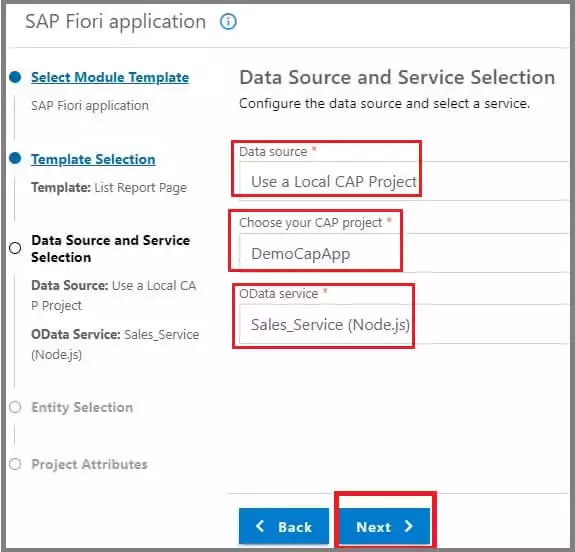
3. At the data source and service selection, choose an option from the dropdown ‘Use a Local CAP Project’ as the data source. Select your CAP project name in the field ‘Choose your CAP project’. Select the OData service which you want to use.
4. In the ‘Entity Selection’ screen, select the service entity that you want as Main Entity. Here we are selecting ‘ZS_SelectHeader’ as Main Entity. Select ‘SItem’ as the navigation entity. Select the radiobutton value as ‘Yes’ and click on ‘Next’.

5. In the ‘Project Attributes’ screen, set the module name, application title, and description that you want (do not set any value in the application namespace). Keep the default value in ‘minimum SAPUI5 version’. Select ‘No’ for all three radio button options (as shown in the below image). Click on the ‘Finish’ button to complete the process.

6. You can see the new project folder ‘salesdetails‘ created under ‘app’ folder.

7. Check if cds watch --profile hybrid is still running. To check, click on the left side navigation menu –> Click on ‘View’ –> Click on ‘Command Pallette’.
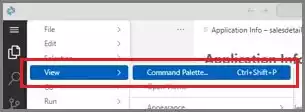
A command pallette will open, search for the command ‘Ports: Preview’ and click on it.

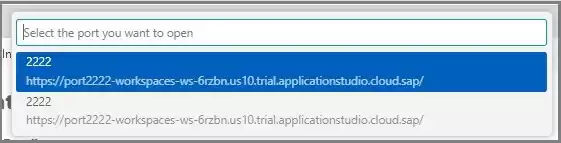
If your service is not running then open the terminal and run the command cds watch --profile hybrid. Click on ‘Open in New Tab’ popup message at the bottom right corner. You can see an URL for your SAP Fiori Application is available under ‘Web Applications’.

Click on the application URL, our application will get loaded on the new screen. Click on the ‘Go’ button.
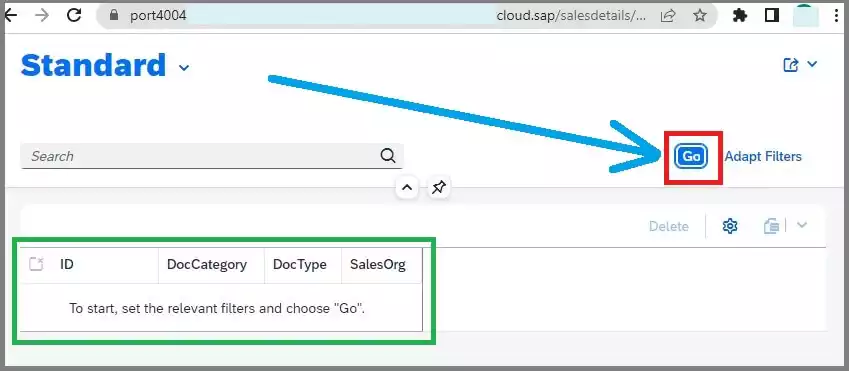
You can see that the sales header details get fetched from the SAP HANA database.

Congratulations! You have created your first SAP CAP Fiori Application.
NOTE – While running any command in the terminal, if you have received a ‘cf oauth token expired’ message (as shown in the below image), then you need to re-authenticate yourself by logging in again.
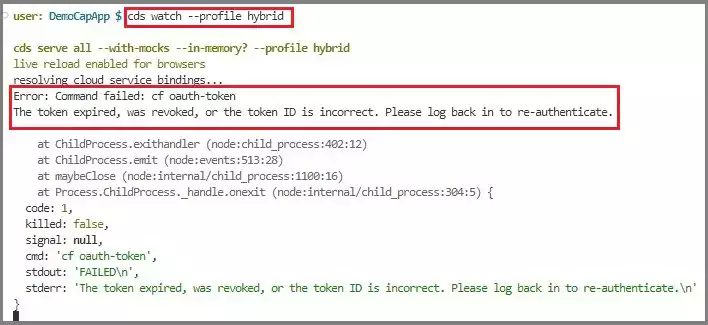
Issue the command cf login and enter your email and password to authenticate.
» Next Tutorial…
Add Security to SAP Fiori Application with XSUAA and Approuter
Conclusion –
Congratulations! You have successfully completed the SAP CAP tutorial series on SAP Fiori Application creation with the CAP model and HANA Cloud. In this Part 2 tutorial, you have generated database artifacts and deployed them into the HANA database, loaded data into database tables in SAP HANA database explorer, tested the CAP service entities locally, and finally created your first SAP Fiori application by consuming the CAP service entities.
Please feel free to comment and let us know your feedback. 😊
If you liked it, please share it! Thank You!
Also Enroll to »» Udemy course SAP BTP Training – From Basics to Advanced [Hands-on] to start your SAP BTP Cloud journey starting from the BTP concepts to the Development of Full-Stack Fiori Applications with CAP Model & HANA Cloud.
» Also Read…
• What is SAP BTP ?
• How to Create SAP BTP Trial Account?
• How to Create SAP HANA Cloud Instances ?
Was searching for this solution everywhere on the internet. Thank you for the Command pallette instruction.
Thanks for providing this tutorial series. Very useful !!!